Load Manager comes with some default Customer Terms and Carrier Terms. These terms will appear on your Invoice and Carrier Report, respectively, and a few other forms. Many users find that these terms fit their needs. If you feel the need to modify them, this can be done in Settings. To get there, just click the Settings button in the main menu.
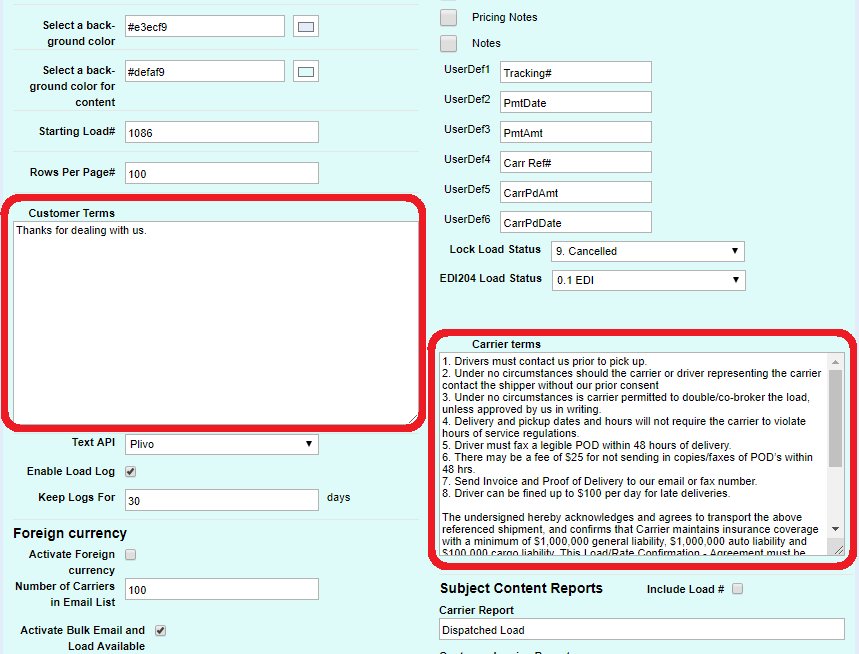
From there, scroll down until you see Customer Terms and Carrier Terms.
Finally, type in your desired terms and click the Save button on the top right.
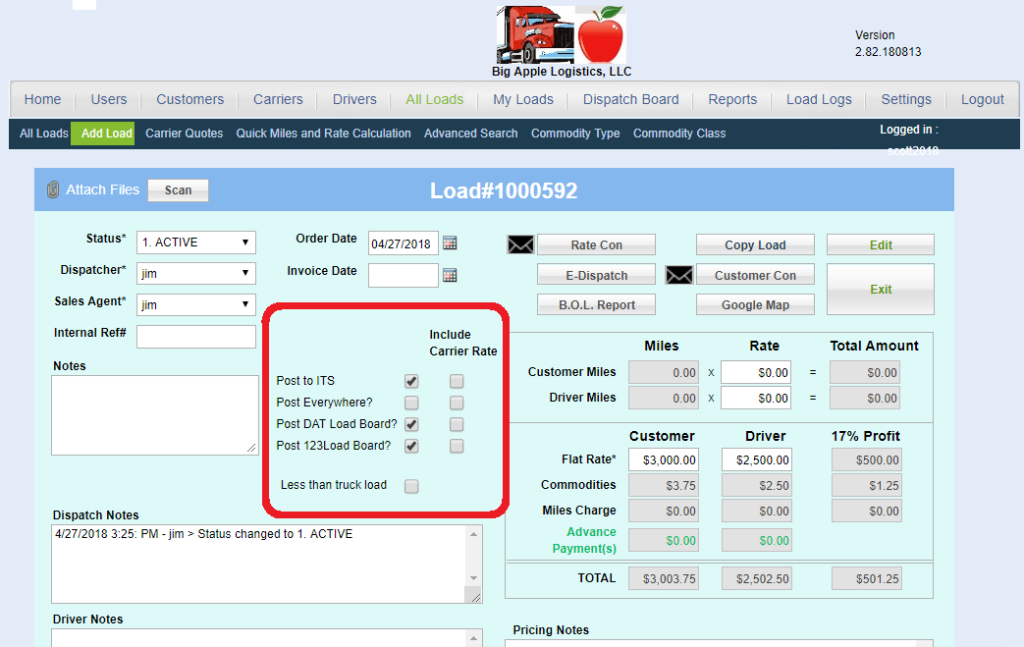
To remove your loads from the load boards, uncheck the checkbox next to the respective load board, and Save. Most load boards will send a confirmation pop-up message “Successfully removed from X load board”. You can also do this in bulk from the All Loads / My Loads screen.
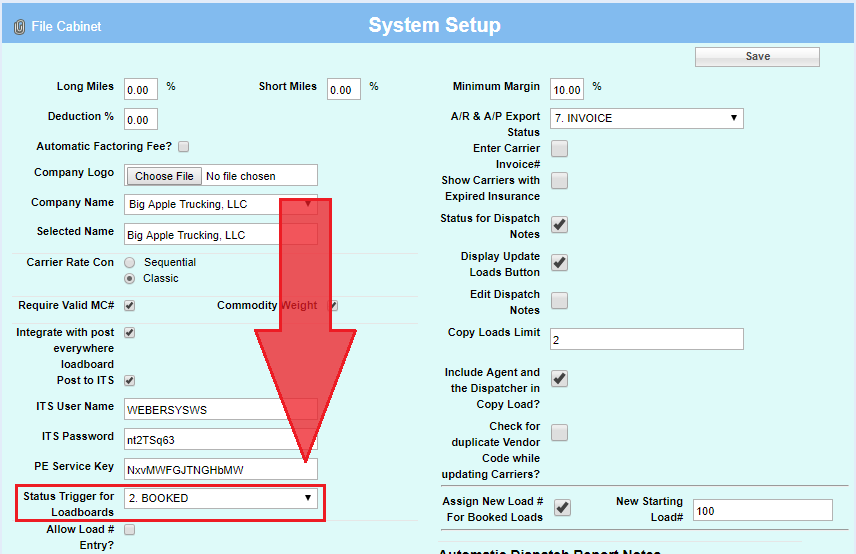
Alternatively, you can use the “Status Trigger for Load Boards” feature. Load Manager can remove your loads from the load boards automatically, depending on the status of the load. This is controlled by the setting “Status Trigger for Load Boards”. To navigate there, just click the Settings button on the main menu.
From there, scroll down to the option “Status Trigger for Load Boards”. When a load reaches this status, it will be removed from the load boards automatically.
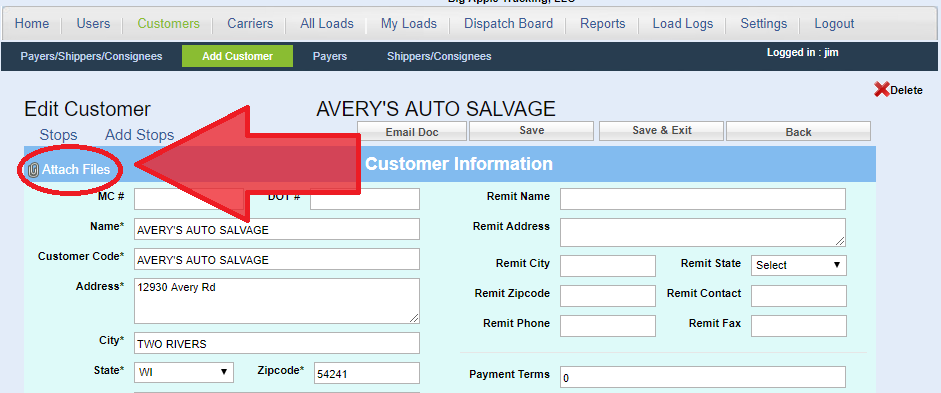
Load Manager allows you to attach documents to any record within the system. This includes customers, carriers, users, and loads. Each record within Load Manager has a paperclip symbol towards the top left of the screen. The record must be saved first before the paperclip symbol will appear.
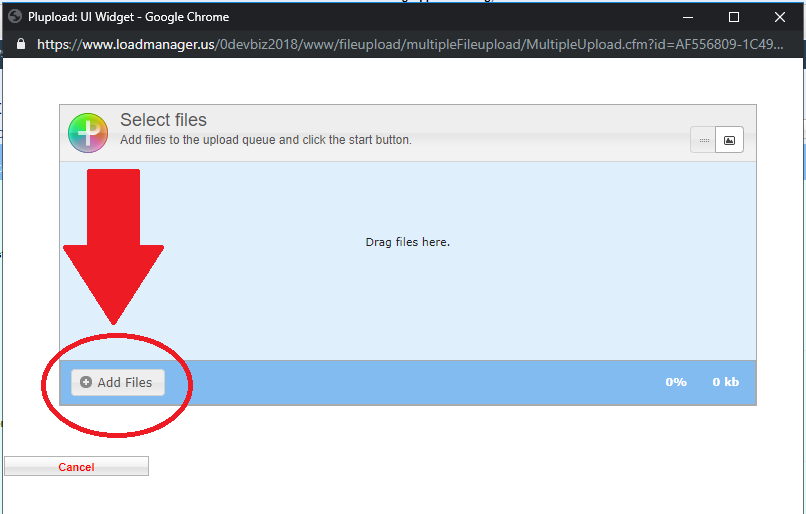
Clicking the Attach Files button will open a new window. You can either drag files into this new window, or click the Add Files button to browse your computer.
By default, Load Manager will create load numbers for you automatically, depending on the Starting Load Number. You can change your Starting Load Number in the Settings menu.
In the Settings menu you can change your Starting Load Number, as well as access another feature – the “Allow Load Number Entry” feature.
Turning on “Allow Load # Entry” allows you to enter your own load number for every load. If you do not enter a load number, Load Manager will create on for you based on your Starting Load #.
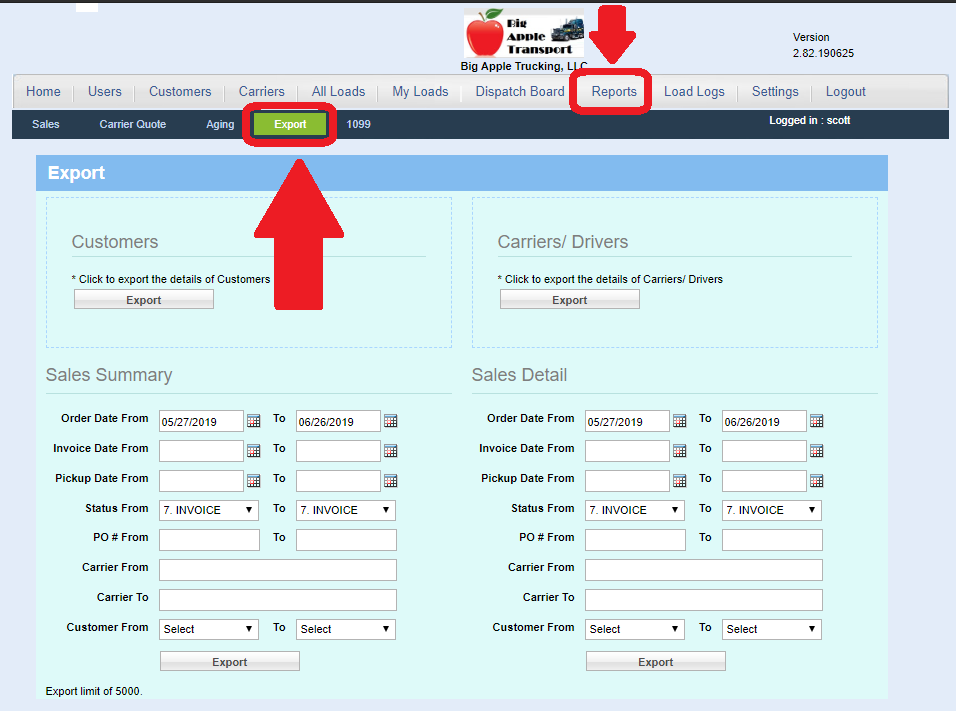
Load Manager TMS can now export your data to Microsoft Excel. To access this feature, click the Reports option on the main menu tool bar. Then, click the Export option in the sub-menu as shown in the screen shot.
There are many different options and filters you can use when exporting your data. The Customers and Carriers/ Drivers exports will output a list of your customers and carriers, respectively.
The two options on the bottom, Sales Summary and Sales Detail will output all of your loads, according to the filters you select. If you want all of your data you do not need to change anything.
The Sales Detail export will also include all stops, accessorials and commodities as separate line items. So you can export one load to take up multiple rows in the exported Excel file. The Sales Summary will only include the Origin and Final Destination instead of all stop. It also will not include any accessorials or commodities. Hence you can expect to see only one row per load. This is helpfull if you want to do calcualtions in Excel on your Sales and Cost of Sales data.
The columns included in the export can be modified by our support team. Feel free to reach out to us via support@loadmanager.com
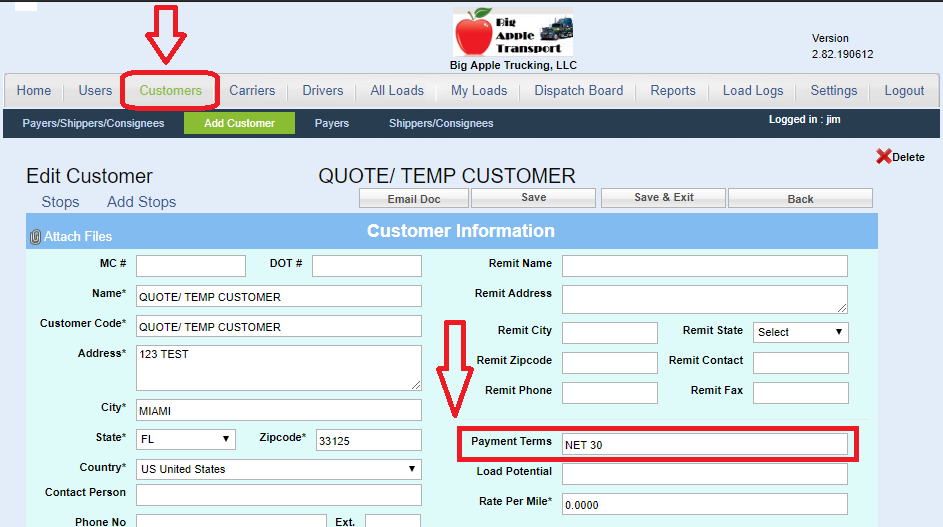
By default, when you send your customer an invoice, the payment terms will be “Due Upon Receipt”. The payment terms are editable on the Customer screen. To get there, just click on the Customers button, and select the customer who’s payment terms you need to edit.
Once you’re there, each customer has a field “Payment Terms”. Whatever you type there will override the default payment terms of Due Upon Receipt.
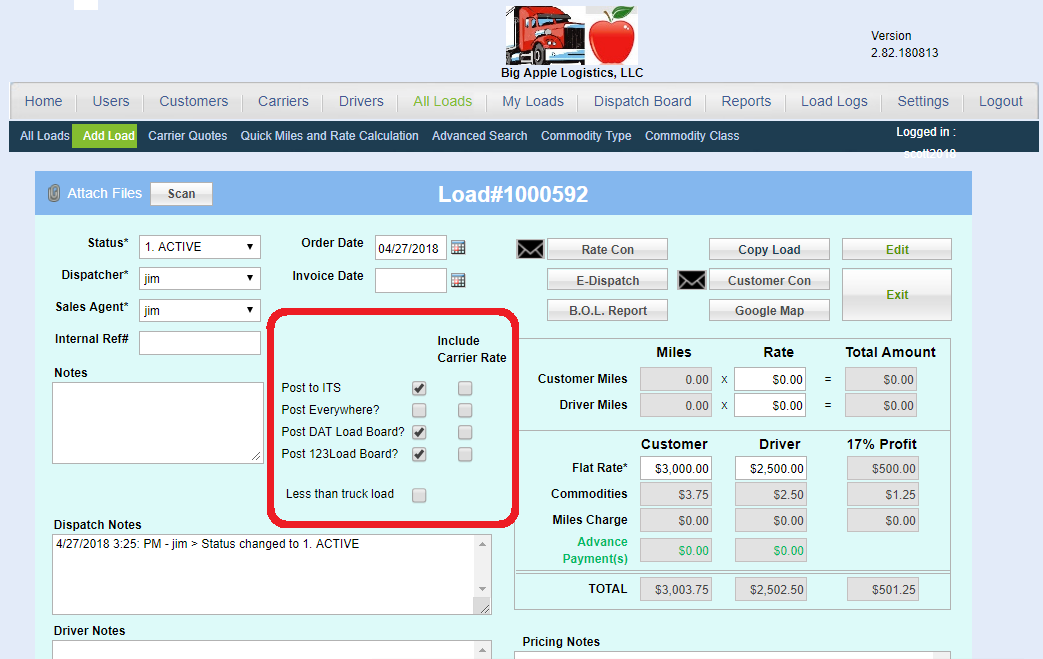
Once load board integrations have been set up on your site, you can use Load Manager to post your loads to load boards by following these instructions.
Each load has a series of load board buttons.
Check these off and Save. Most load boards will send a confirmation pop-up message: “Successfully posted to X load board”. Please make sure your load has all of the values required by load boards. Most load boards require a:
pickup date
delivery date
equipment
# of miles
commodity with weight
You can also post the Carrier Rate with the “Include Carrier Rate” checkboxes. If your Load Manager site has not been integrated, please email support@loadmanager.com and include the usernames and passwords for your load boards.